Baseball Stadium Cake

Yet another baseball cake!! What can I say my nephew really loves baseball.  This year I went for a stadium.

I wish I had gotten pictures of how I stacked the cakes but unfortunately I did not.  I used the grass tip for all the buttercream and fondant for the decorations.  The “stands” are rice krispie treats and fondant.  I used royal icing for my “glue” to get the sprinkles to stick.  I think I turned out pretty good although I would spend a little more time perfecting the stadium next time.

Hope this gives someone a different idea 🙂 dsc_0910

Starwars Cake

For my stepkids 11th and 13th birthday we did a Starwars theme this year.  I made the cake…this was the biggest, heaviest cake I’ve made yet.  

This was my first time making fondant myself and it was easy and tasted great!  Although I did not make the black fondant. Black fondant is a pain to tent. 

For the Yoda head I used half a ball cake and used fondant over it. On the Chewy part I used a grass tip to make his fur (this tip is amazing for a lot of things). R2-D2 was pretty easy. 

My stepkids loved it and I loved it!  I’ll be posting their party soon!  It was a really fun party to plan!

DSC_0684.JPG

Baseball Cake #3

Here is my last cake.  Click here to see #1 and #2.  This was a last minute cake that I decided to make the night before.

This was by far the most simple cake out of the three. I love how it turned out!

 thumb_DSC_4410_1024

I used the ball cake pan again to make half a ball. I got store bought frosting (I normally don’t).  I have seen this technique done before but was a little worried how it was going to work on a rounded surface.  (Note: I always freeze my cakes before frosting).

thumb_DSC_4411_1024

Warm your frosting up in the microwave.  I did 30 second increments till it was runny but not hot. Then I started to pour moving in circular motions.  You will use the whole can of frosting.  I did two coats.  After 15 minutes I scooped up the leftovers on the mat and microwaved it and poured again.  I was so impressed with how well this worked.

thumb_DSC_4414_1024

For the cupcakes I used the same microwaved frosting to dip the cupcakes in.  This worked really well to give a smooth surface to put the red laces on.  I had some leftover green frosting from my previous cakes that I used to put “grass” around the big ball.  I love how this one turned out.

Baseball Cake #2

Here is baseball cake #2.  Click here to see cake #1!  I decided to make a home plate with a ball this time. thumb_DSC_4395

I baked my cake in a 10′ pan.  So I had to find the middle.

thumb_DSC_4396

I marked it with a tooth pick for reference.

thumb_DSC_4398

Then I found 5″ on each side of the cake and marker them with tooth picks.  No this is where that nice metal ruler comes in handy.  Make sure you clean it well or keep one for baking.  Use your ruler to make light marker with the edge.

thumb_DSC_4399_1024

Two nice simple cuts with a serated knife.

thumb_DSC_4400_1024

And you have a home plate! Simple!

thumb_DSC_4429_1024

Here is what it looked like all done.  I decided to use my star tip on the ball to give it some dimension and help it not look flat with the smooth frosting on the bottom!

Baseball Cake #1

My nephews have birthday’s just a day apart so that means a lot of birthday cake.  My sister-in-law asked me if I would make the cakes for their parties this year.  I am not going to lie…I was a little nervous.  I had never made a cake for someone else before.  They wanted baseball themed cakes, so I found the Wilton ball cake pan and got to work.  I found a great youtube tutorial for this cake!

 thumb_DSC_4374_1024 trystan cake

thumb_DSC_4371 thumb_DSC_4372_1024I will do a post about how I made the stadium sign behind that cake soon!

Minecraft Birthday Party

DSC_3270-001

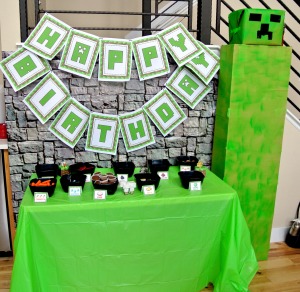
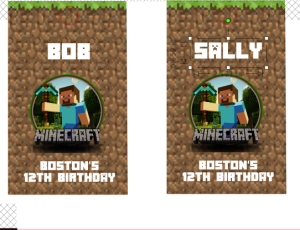
My step son turned 12 years old. He wanted a Minecraft birthday.  I knew nothing about Minecraft!  I’ve never seen him play or anything! So this required me to have many talks with him, he loved it, I felt confused most of the time.  I decided to go with green as the base theme!  I downloaded the Minecraft font and then started making signs, like above.

DSC_3457 

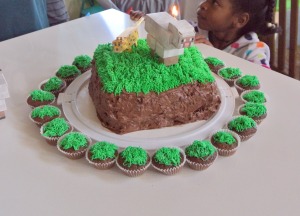
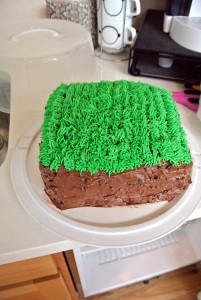
I had a major fail on my step daughters cake so I was a little scared to make another one.  I found out freezing the cake makes all the difference in the world!  I made a square cake and chocolate frosting, I crushed Oreo’s and added them into the frosting to make it look like mud.  I use my Winton grass tip to make all the grass like frosting.  We have a very big family so I made some mini cupcake just incase we needed more. I also found these cute cardboard figures on amazon and placed them on top.

DSC_3204-001

 DSC_3273-001

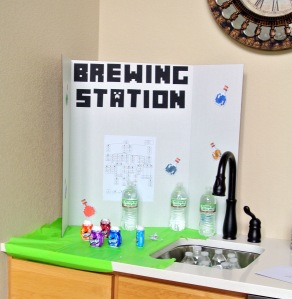
My step son tole me about the potions and brewing them.  So I found a potion diagram on google and put it on the board.  I used Koolaid squirt bottles so the kids could make their own “potions”.

DSC_3277-001

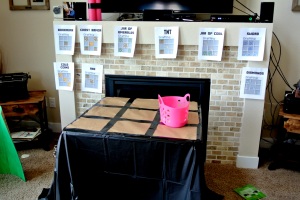
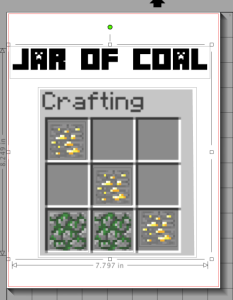
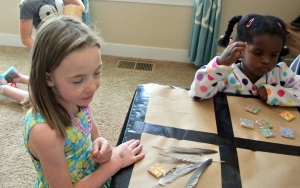
For an activity I decided to do a scavenger hunt with a crafting table.  I used a card table, tablecloth, and duct tape to make the “crafting table”. I made crafting templates with my Silhouette Cameo software.   I bought a bunch of prized at the dollar store that seemed to fit the theme.  I got sword, chest armor, axes, and much more.  I also made little tupperware with coal, diamonds, and emeralds.  I used my silhouette Cameo and make stickers to put on them.  I wish I had pictures of how they turned out.

Screen Shot 2015-07-07 at 7.26.05 PM

I made these wooden scavenger hunt pieces for the scavenger hunt.  See how I made them here.

 DSC_3199-001

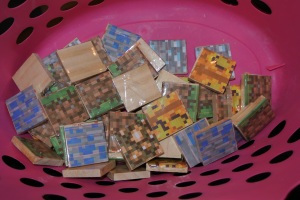
They came inside and matched their pieces to get their prizes.  This was a little crazy, but they had fun!

DSC_3396

I didn’t get a picture of the cute lanyards I made.  I loved how they turned out.  I again used my Silhouette Cameo.

Screen Shot 2015-07-07 at 7.33.18 PM

DSC_3283-001

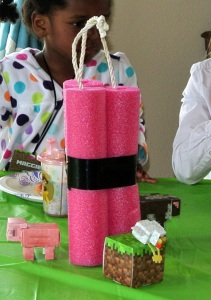
I made these “dynamite” out of pool noodles.  I used duct tape and taped them together.  My husband is always thinking about the details, so he got the rope out and tape three pieces together and I hot glued them into the holes.

DSC_3412

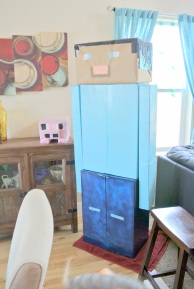
I started collecting boxes about a month before the party.  I just went for it with Steve and the pig.  For Steve I cut a narrow long box in half for the arms and spray painted them and the large box and light blue, then I spray painted the other large box dark blue.  I used brown packing paper for the head, and I used black duct tape for the hair and painted all the other features. I decided to use a pink tablecloth for the pig and wrapped all the boxes individually.  Afterward I think it would have been better to spray paint it.

I really enjoyed this challenge of this party!